How to create an Invoice Template
An Invoice is a document of goods and services rendered with a statement of the total amount due. Using Informer, you can populate an invoice with data already in your instance. This Template uses the Designer editor, the code editor, Inputs, Processors, and Assets.
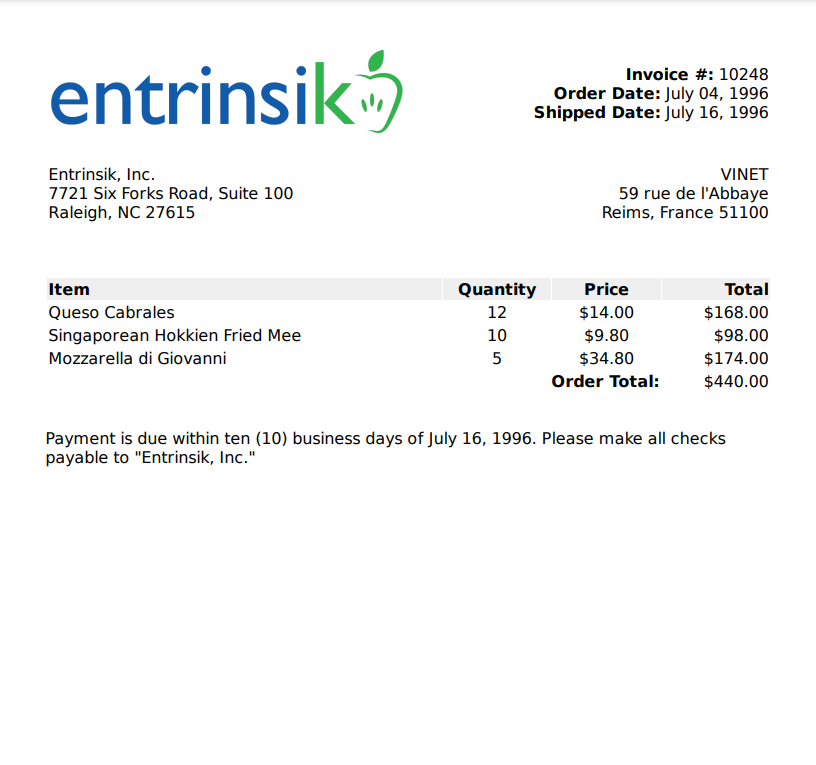
-
Create a blank Template by clicking + New and selecting Templates under Reports. Enter a name and optional description, then click Save.
-
Add a Dataset by clicking the + button next to Processors, selecting Dataset, choosing the Dataset, and clicking Save. This example uses Northwind Orders.
-
Create a Power Script to reference the context variables from the Dataset. Click the + button next to Processors and select Power Script:
$ctx.orders = _.cloneDeep($ctx.northwindOrders.records).filter(r => r.orderId === $ctx.inputs.orderNumber); -
Add an Input by clicking the + button next to Inputs and selecting Input Box under the Numeric menu. For this example, the Input is named
orderNumber. -
Attach a logo by clicking the + button next to Assets, selecting Upload Files, and attaching a logo image. In the code editor, reference it with
<img src="{{ url('entrinsik-logo.png') }}" width="100%">. -
Create the tables and add the static information in the Designer editor (see Creating the tables).
-
Switch to the code editor and add the contextual data and the logo (see Creating the contextual information).
Example code
<!DOCTYPE html>
<html lang="en">
<head>
    <meta charset="UTF-8">
</head>
<body>
    <table style="width: 100%;">
        <tbody>
            <tr>
                <td style="width: 50%;">
                    <img src="{{ url('entrinsik-logo.png') }}" width="100%">
                </td>
                <td style="width: 50%; text-align: right; vertical-align: middle;">
                    <strong>Invoice #:</strong> {{ orders[0].orderId }} <br>
                    <strong>Order Date:</strong> {{ moment(orders[0].OrderDate).format('MMMM DD, YYYY') }} <br>
                    <strong>Shipped Date:</strong> {{ moment(orders[0].ShippedDate).format('MMMM DD, YYYY') }} <br>
                </td>
            </tr>
            <tr>
                <td style="width: 50%;">
                    Entrinsik, Inc.<br>
                    7721 Six Forks Road, Suite 100<br>
                    Raleigh, NC 27615
                </td>
                <td style="width: 50%; text-align: right; vertical-align: middle;">
                    {{ orders[0].customerId }}<br>
                    {{ orders[0].ShipAddress }}<br>
                    {{ orders[0].ShipCity }}, {{ orders[0].ShipCountry }} {{ orders[0].ShipRegion }} {{ orders[0].ShipPostalCode }}<br>
                </td>
            </tr>
        </tbody>
    </table>

    {% set orderTotal = 0 %}

    <table style="width: 100%;">
        <tbody>
            <tr>
                <td style="width: 55%; background-color: rgb(239, 239, 239);"><strong>Item</strong></td>
                <td style="width: 15%; text-align: center; background-color: rgb(239, 239, 239);"><strong>Quantity</strong></td>
                <td style="width: 15%; text-align: center; background-color: rgb(239, 239, 239);"><strong>Price</strong></td>
                <td style="width: 15%; text-align: right; background-color: rgb(239, 239, 239);"><strong>Total</strong></td>
            </tr>
            <tr data-repeat="order in orders">
                <td>{{ order.ProductName }}</td>
                <td style="text-align: center;">{{ order.Quantity }}</td>
                <td style="text-align: center;">{{ numbro(order.UnitPrice).formatCurrency('-0,0.00') }}</td>
                <td style="text-align: right;">{{ numbro(order.orderAmount).formatCurrency('-0,0.00') }}</td>
                {% set orderTotal = orderTotal + order.orderAmount %}
            </tr>
            <tr>
                <td style="text-align: right;" colspan="3"><strong>Order Total:</strong><br></td>
                <td style="text-align: right;">{{ numbro(orderTotal).formatCurrency('-0,0.00') }}<br></td>
            </tr>
        </tbody>
    </table>
    <p>
        Payment is due within ten (10) business days of {{ moment(orders[0].ShippedDate).format('MMMM DD, YYYY') }}. Please make all checks payable to "Entrinsik, Inc."
    </p>
</body>
</html>
Creating the tables
The basis of this Template is a series of tables that contain the information from the connected Dataset. The first table contains the logo, order number, order and ship dates, and addresses. Insert it by clicking Insert Table and adding a 3x2 table, then add and format the text.

Click below the table and press Enter to add a blank line. Create the next table by clicking Insert Table and adding a 3x4 table. Select the top row by clicking and dragging across the cells, then click the Cell Background paint bucket and set the color to light grey (hex EFEFEF). Select the first three cells on the bottom row, click Cell, then Merge Cells.
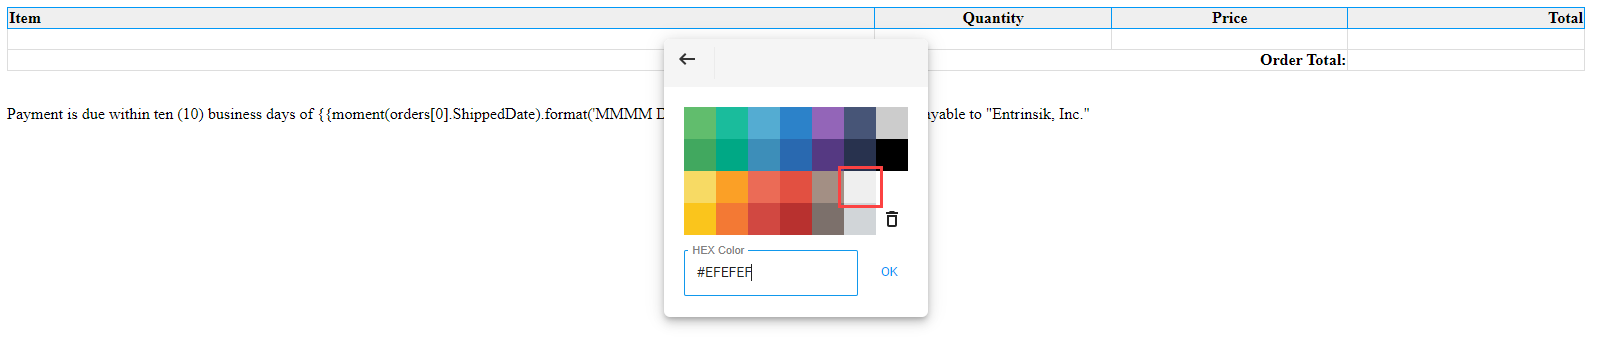
Click below the table, press Enter, and enter the text explaining the invoice.
Creating the contextual information
This Template uses a Power Script to take an Input from a User and populate the invoice with data from the connected Dataset whose Order ID matches the Input. Use orders[0].field to add the data where it is needed. The Field names are found in the Context Viewer.
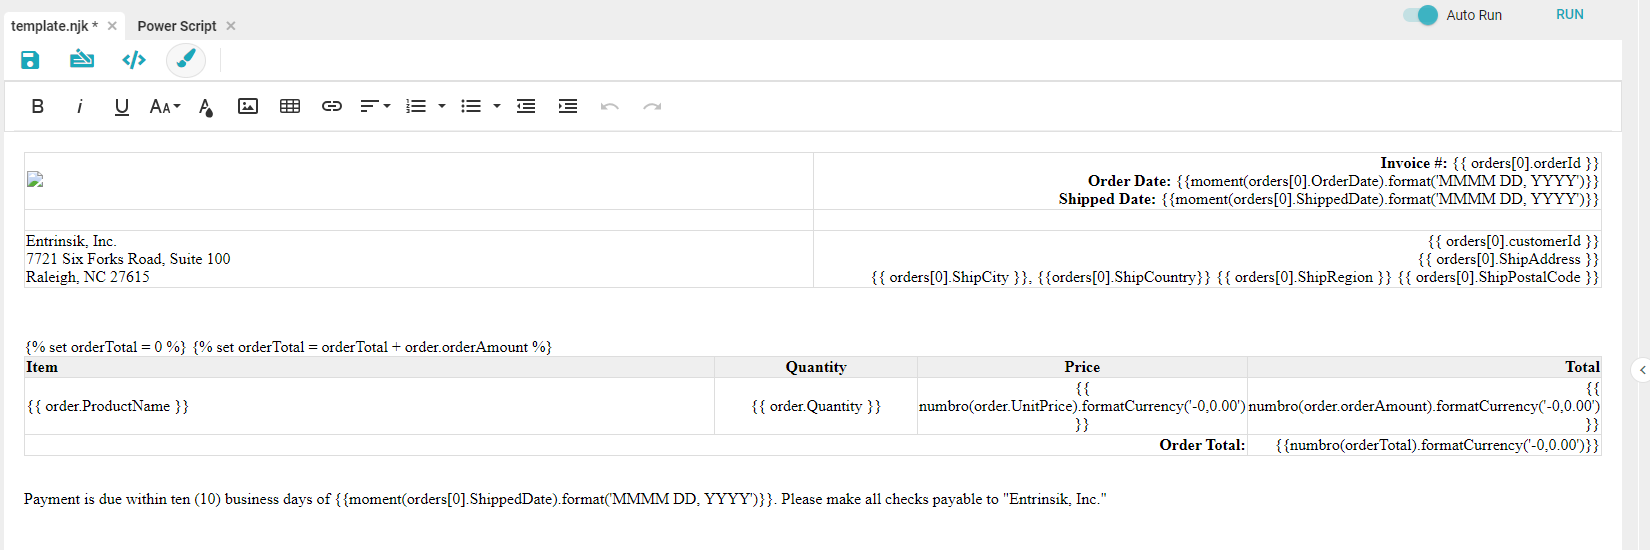
Some Fields need formatting to display correctly. For this Template, prices and dates need formatting. Use the following to format a price as US currency and a date as Month Day, Year:
{{ numbro(PRICE_FIELD).formatCurrency('-0,0.00') }}
{{ moment(orders[0].DATE_FIELD).format('MMMM DD, YYYY') }}
The last step is a loop to populate the order information table. In the code editor, add the looped row:
{% set orderTotal = 0 %}
<tr data-repeat="order in orders">
    <td>{{ order.ProductName }}</td>
    <td style="text-align: center;">{{ order.Quantity }}</td>
    <td style="text-align: center;">{{ numbro(order.UnitPrice).formatCurrency('-0,0.00') }}</td>
    <td style="text-align: right;">{{ numbro(order.orderAmount).formatCurrency('-0,0.00') }}</td>
    {% set orderTotal = orderTotal + order.orderAmount %}
</tr>
{% set orderTotal = 0 %} creates a variable and sets it to 0. The data-repeat="order in orders" attribute starts a loop that creates rows and populates each cell with data from the order that matches the Input. Finally, {% set orderTotal = orderTotal + order.orderAmount %} adds all the order amounts together to create the total cost.