Scanning a Datasource
For Informer to recognize the metadata in a database, it first has to scan the DatasourceA connection from Informer to a database or other system of record, such as PostgreSQL, SQL Server, or UniVerse.. Scanning creates Mappings inside Informer that match the files, tables, and fields in the database. The scan options are below.
Scanning the Datasource
After connecting a new Datasource, open it from the Datasource listing page. If it has not been scanned, three buttons appear in the middle of the page. Click Scan Datasource to open the scan options.
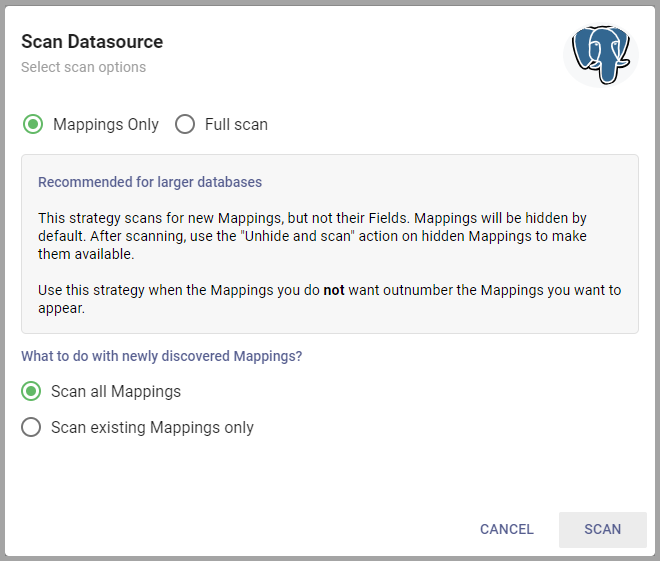
Mappings Only
Mappings Only scans the file and table names from the database into Informer Mappings. New Mappings start hidden and have no Fields. Afterward, unhide Mappings or scan them for Fields, individually or in bulk (see Scanning Mappings below). Use this when more Mappings are unwanted than wanted.
Full Scan
A Full Scan scans the Datasource for its Mappings, then scans each Mapping for its Fields, in one pass. It first performs a Mappings Only scan, except new Mappings are visible by default, then scans every visible Mapping for Fields. This avoids scanning Mappings individually, but any unwanted Mappings must be hidden separately (see Hiding and unhiding Mappings).
Some Datasource kinds do more while scanning. Informer and Salesforce types, for example, also scan Links and Views. This extra behavior is specific to the Datasource kind and is usually automatic.
A Full Scan, or scanning a Mapping for Fields, may present additional options that vary by Datasource kind. The Full Scan option is not available for U2 Datasources, for performance reasons.
Handling newly discovered Mappings
The What to do with newly discovered Mappings? options control what happens on a rescan:
- Scan all Mappings: scans and updates all Mappings (and, on a Full Scan, Fields), new and existing.
- Scan existing Mappings only: scans and updates only Mappings that already exist on the Datasource, adding no new Mappings or Fields. Use this when a newly created Mapping would cause confusion on an existing Datasource.
Scanning Mappings
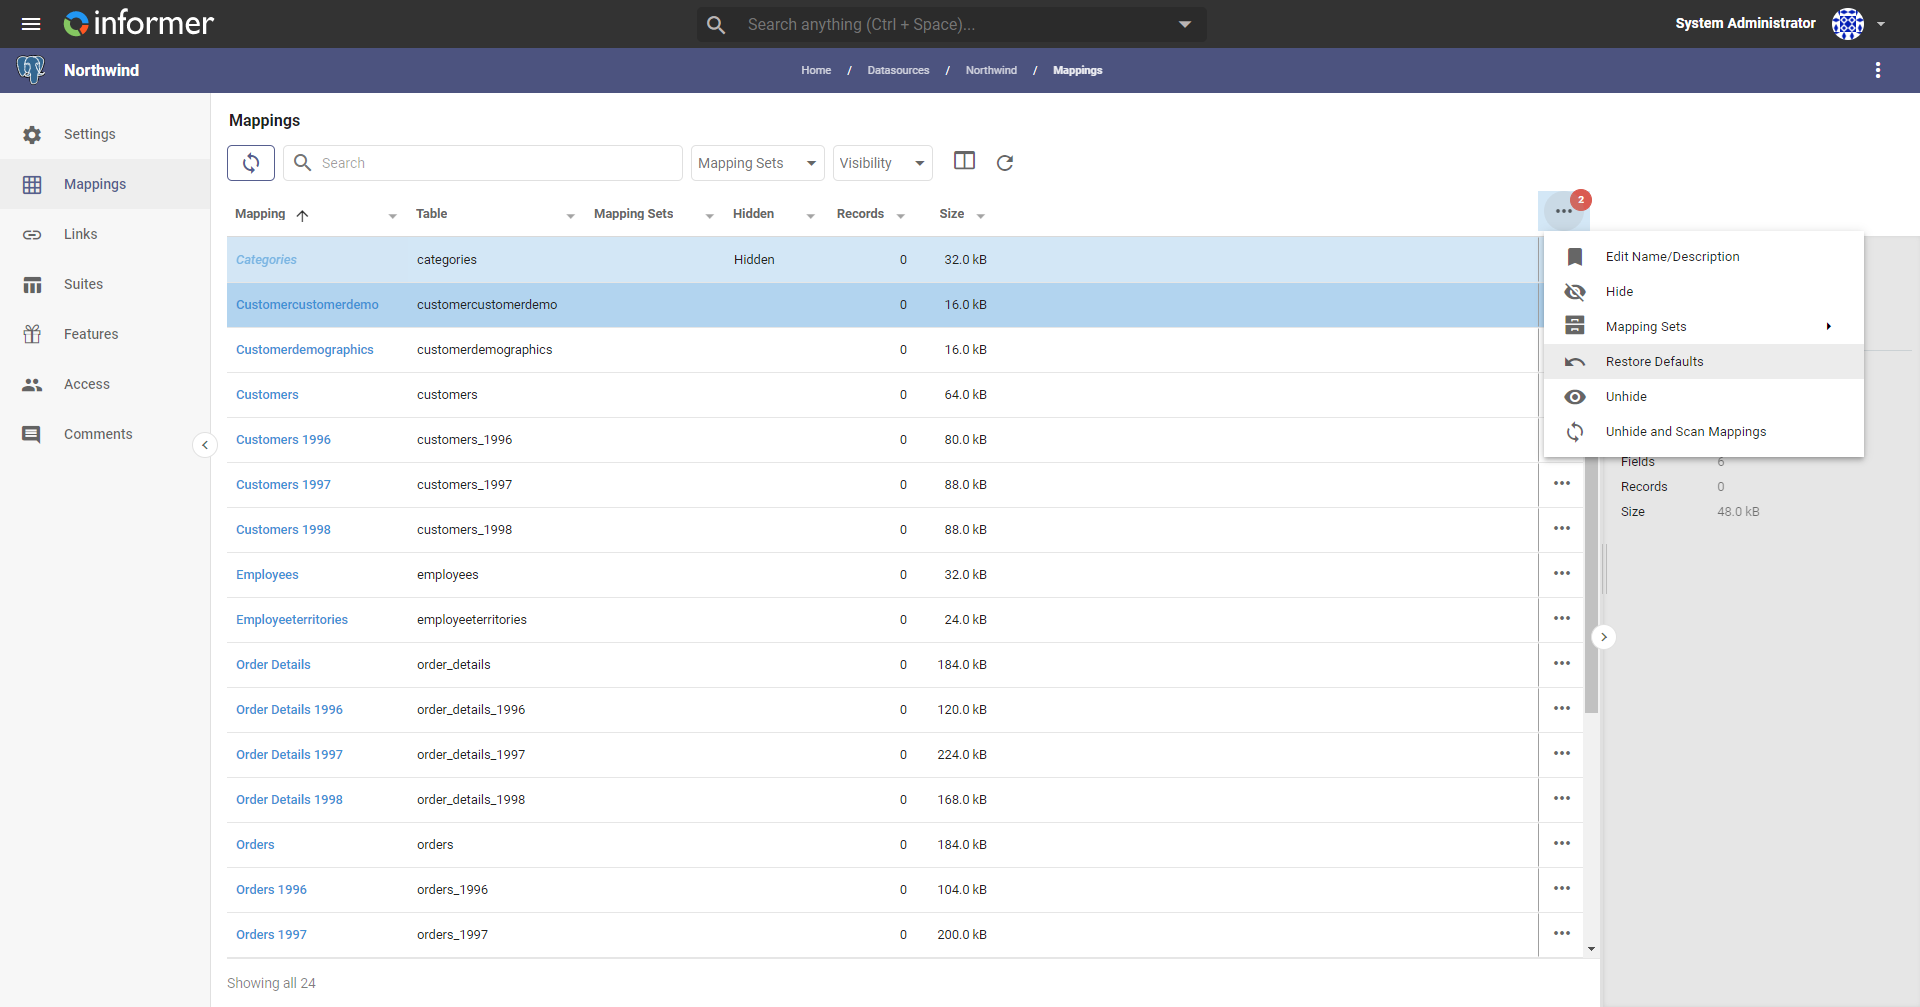
After a Mappings Only scan, scan the Mappings you need separately. Choose Hidden in the Visibility dropdown to list the newly created Mappings, select the ones to include, then click Actions in the top-right corner and choose Unhide & Scan Mapping.
Scanning ability varies by Datasource kind (not a comprehensive list):
- UniVerse Mapping field scans have only A/S/D and I/V descriptor options; UniData has only D and I/V. Neither U2 kind has a Full Scan.
- Most SQL Datasources have the Full Scan option and present no options when scanning a Mapping for Fields.
- REST Web API Datasources cannot be scanned.
- Informer Datasources always write Links during any scan.
- Salesforce Datasources always Full Scan (per-Mapping field scans are not supported).
- Workspace Datasources do not need scanning; their Mappings come from uploaded Files.
Additional U2 Datasource options
Include or exclude options as needed:
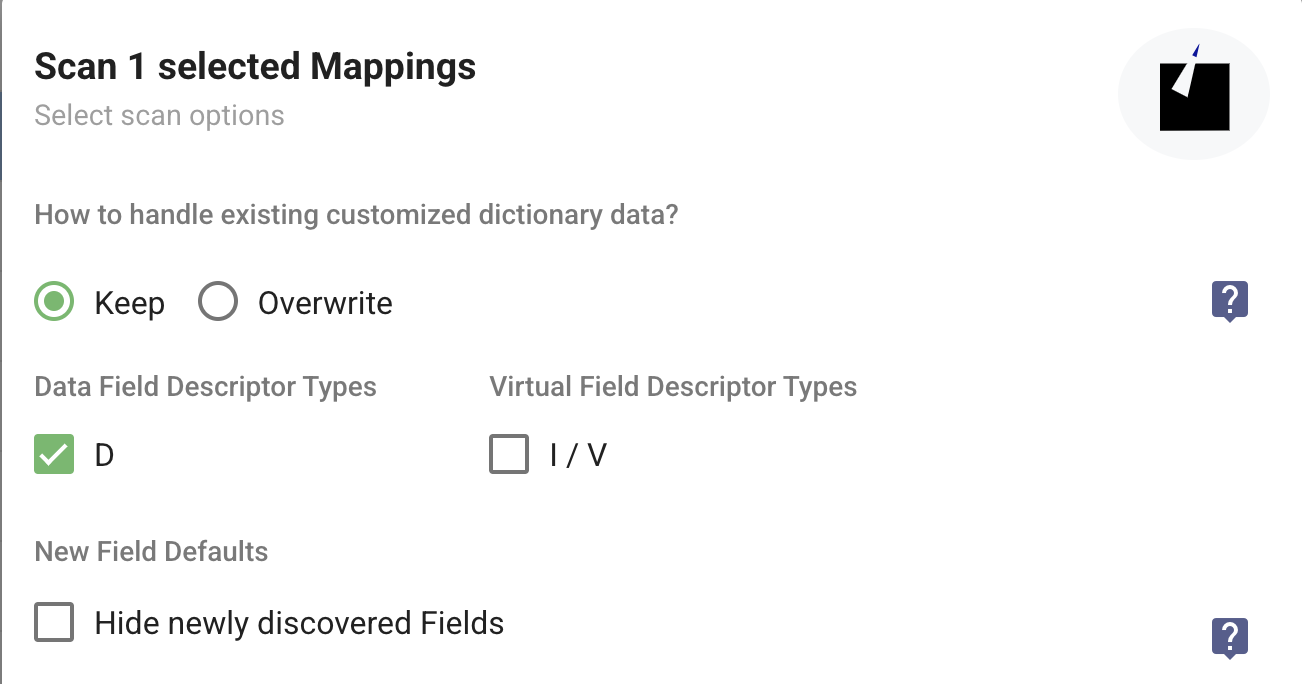
By default, when scanning, Informer keeps the current values of an existing Field (Single/Multi/Subvalued setting, Conversion Code, Correlative expression, Association, Attribute Number, Dictionary Type, and SB+ details) if the Field came from a legacy Informer Package (.ixp) or any of those values were customized since it was first scanned. Scanned values from the native dictionary are ignored for those Fields.
To take the native dictionary values instead, choose Overwrite. When overwriting, it is strongly recommended to also scan all descriptor types, so any incorrectly imported legacy Fields are fully corrected to their actual dictionary type. This has no effect on custom-expression Fields, newly discovered Fields, or Fields that were not imported from a legacy Package and have not been customized.
Next, select the Data Field Descriptor types to scan for. Finally, in New Field Defaults, choose whether newly discovered Fields are hidden or shown. Hiding them helps with databases that have many Fields where you prefer to show only the ones you need. Click Scan to begin.
Updating Mappings
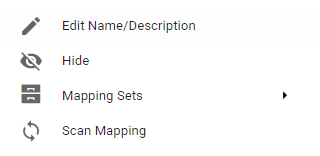
To sync a Mapping with native database changes (new Fields on a U2 File, new columns on a SQL table), open the Mapping's Actions menu (the three vertical dots in the top-right corner), or use the three horizontal dots on the Mapping's row in the Mappings list, and choose Scan Mapping.
Web Datasources have no Mappings or Fields and do not need scanning.