Saving and managing Filters
Instead of creating the same Filters repeatedly, use saved Filters to speed up filtering.
Saving a Filter
Click the Save as icon on the right side of the Filter Ribbon, enter a name, and click Save. Newly saved Filters are Private by default.

Applying a saved Filter
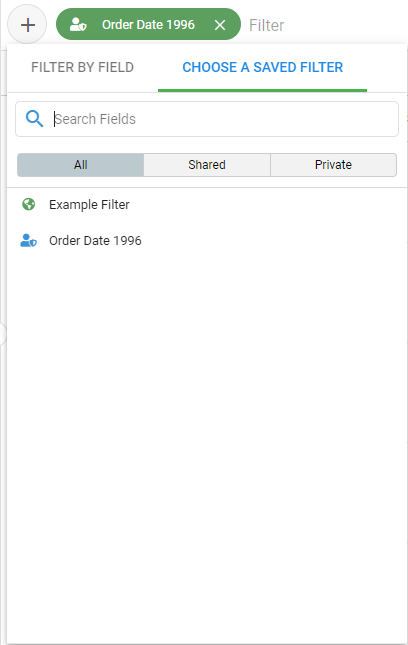
Click Add a Filter in the Filter Ribbon, click the Choose a Saved Filter tab, then click the Filter to add it to the Query. All available saved Filters appear in this list, or use the Shared or Private tabs to narrow it.
Merging Filters
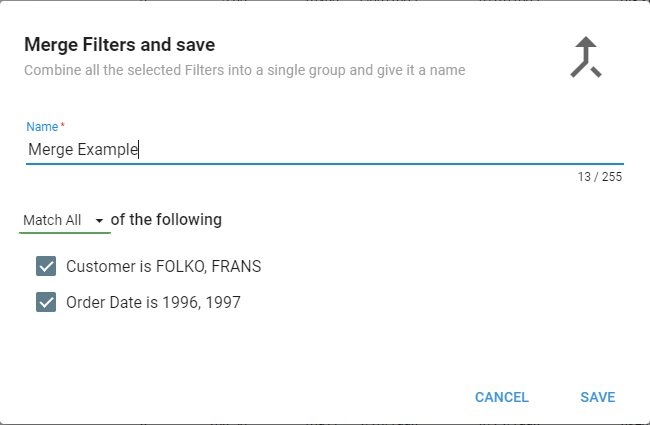
Add all the desired Filters to the Query and click the Merge icon on the right side of the Filter Bar to merge multiple saved Filters that are commonly used together.

Enter a name for the merged Filter, then select from the dropdown:
- Match All: the logical AND operator. Applies all Filters together.
- Match Any: the logical OR operator. Applies any of the Filter parameters.
- Match None: the logical NOT operator. Removes the Filter results from the display.
To exclude any Filters from merging, uncheck the boxes next to them, then click Save.
Updating or copying a saved Filter
There are two ways to update or copy a saved Filter: from the Data panel with the saved Filter applied, or from the Filters Listing Page.
Data panel
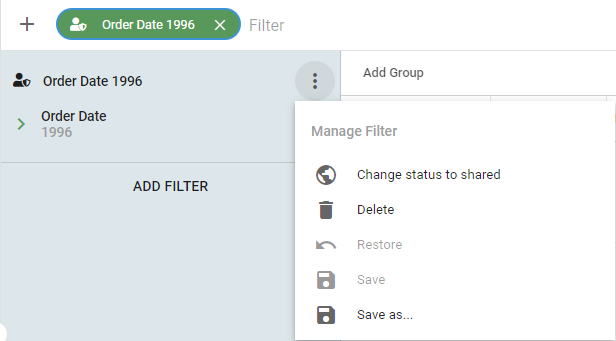
Click the saved Filter's bubble to update it with the Filter applied, then add, change, or remove nested Filters. After making changes, click the Manage Filter icon in the top-right of the Filter panel, then Save as....
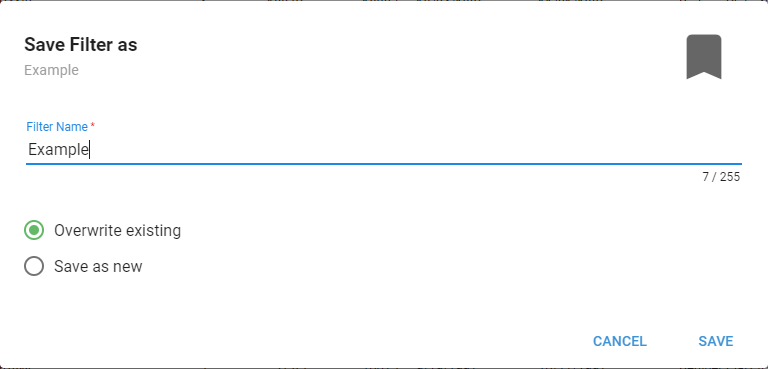
Choose Overwrite existing to overwrite the saved Filter, or change the name and choose Save as new to create a new saved Filter with the changes.
Filters Listing Page
The Filters Listing Page is only available on Dataset Queries.
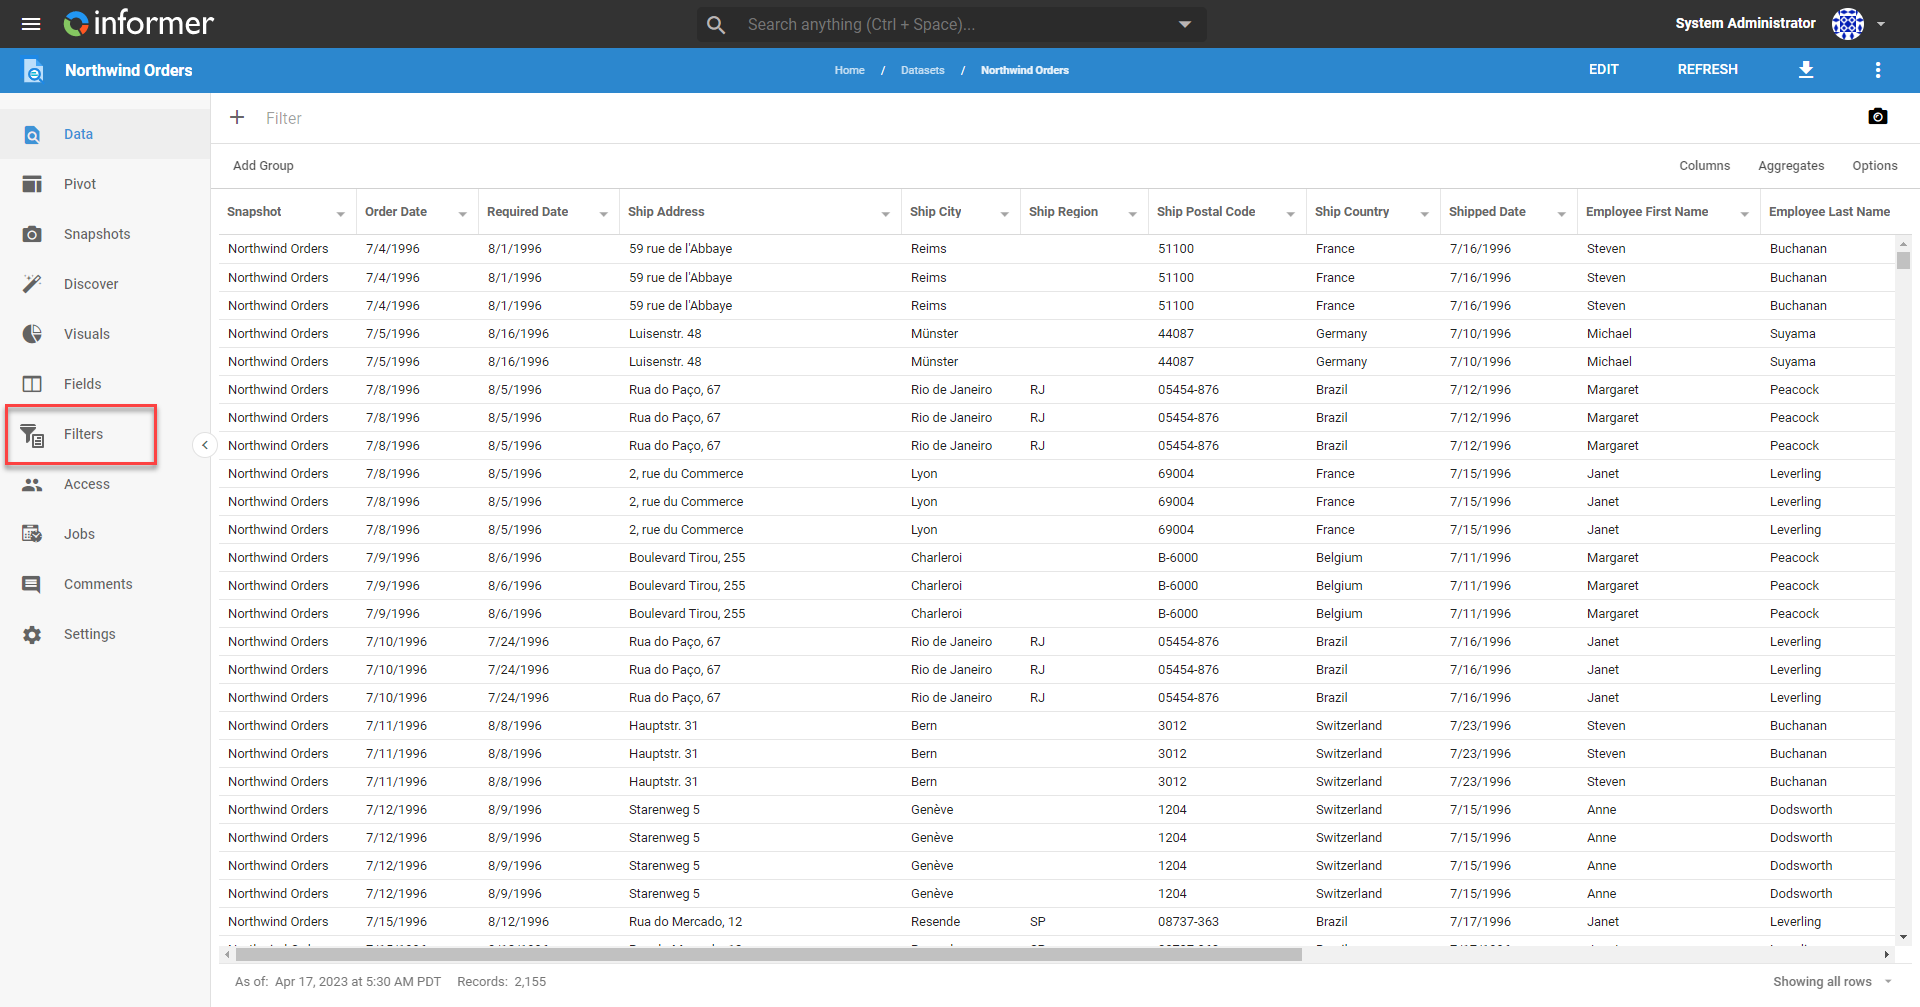
Any User with the Data Wizard role or higher in the Team that owns the Dataset can manage all the saved Filters on that Dataset. Click the Filters icon in the left panel of a Dataset to open the Filters Listing Page.
The Filters Listing Page shows all existing Filters and whether each is Shared or Private. Shared Filters are available to anyone with access to the Query and appear with a globe icon; Private Filters are only available to their creator and Super Users and appear with a shielded-person icon.
Click + New to add a Filter. Highlight a Filter and click the ... on the right of its row for the Actions menu.
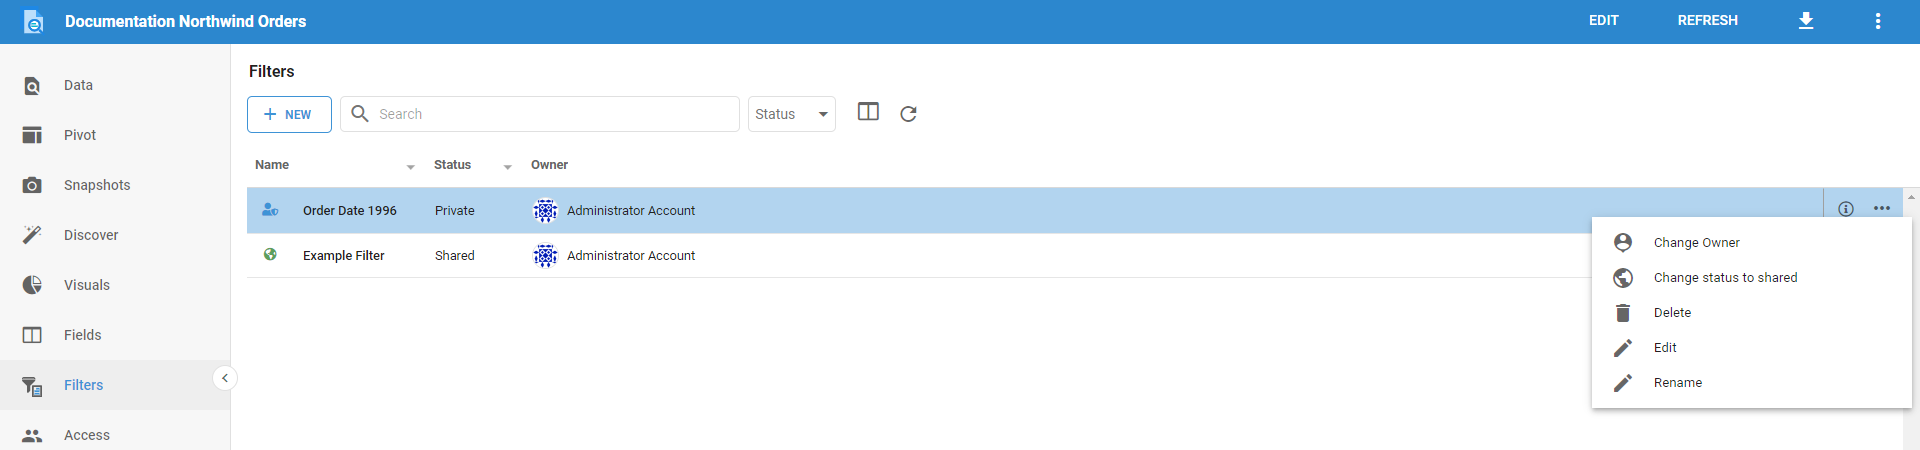
The Actions menu options:
- Change Owner: change the Filter's owner to a Team or User with access to the Dataset.
- Change Status: change the Filter between Shared and Private.
- Delete: delete the Filter. This cannot be undone.
- Edit: open the Filter edit page.
- Rename: change the Filter's name.