Filtering a Data View
Post-query Filters are available in Data Views, the same as on a Dataset. If saved post-query Filters exist in a Dataset, they are also available in Data Views. They work the same way as Filters on a Dataset: the filtered results generate dynamically without rerunning the Query. Filtering applies to all Data Views for the selected Dataset.
Adding Filters
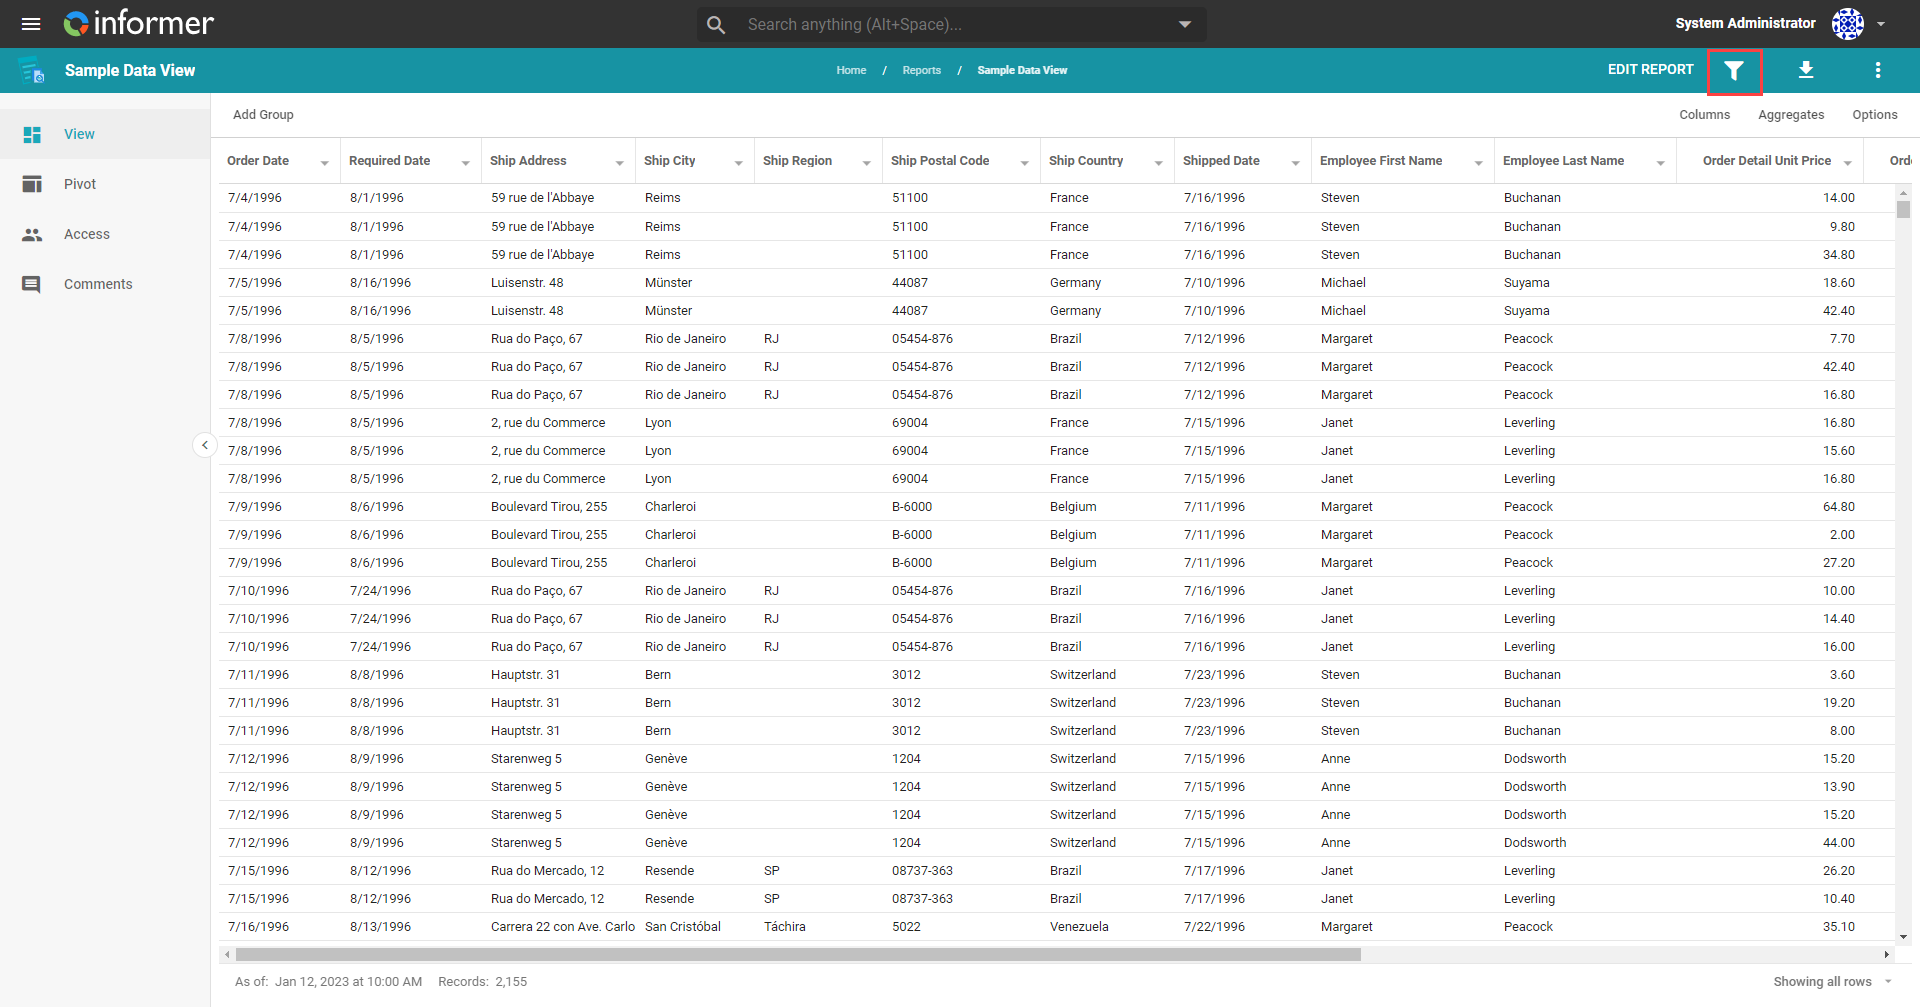
You can filter a Data View either while viewing or while editing it. When viewing, click the Filter icon in the top-right to open the Filter panel.
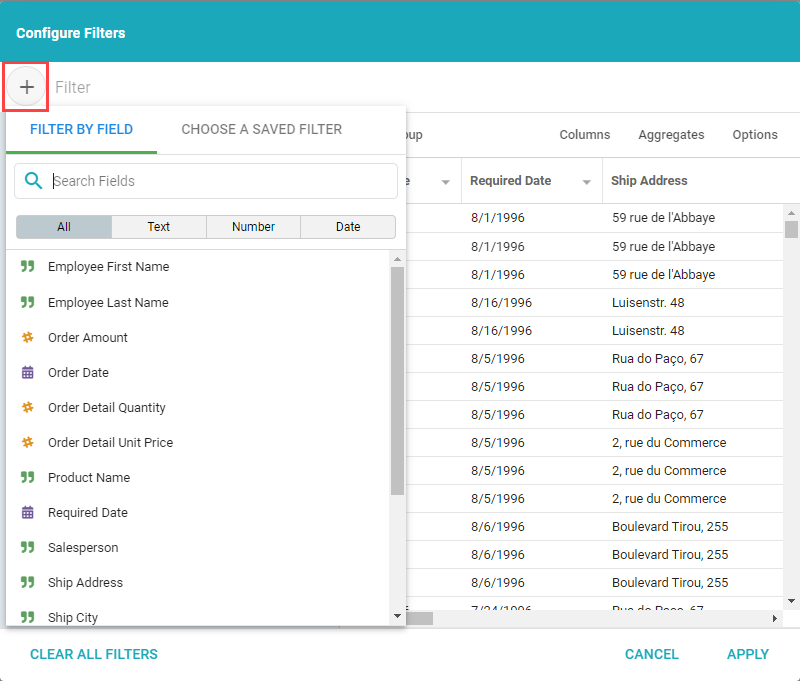
Click the + icon at the left of the Filter bar and choose how to filter the data. Select the Fields to filter on, or use a Saved Filter from the Dataset.
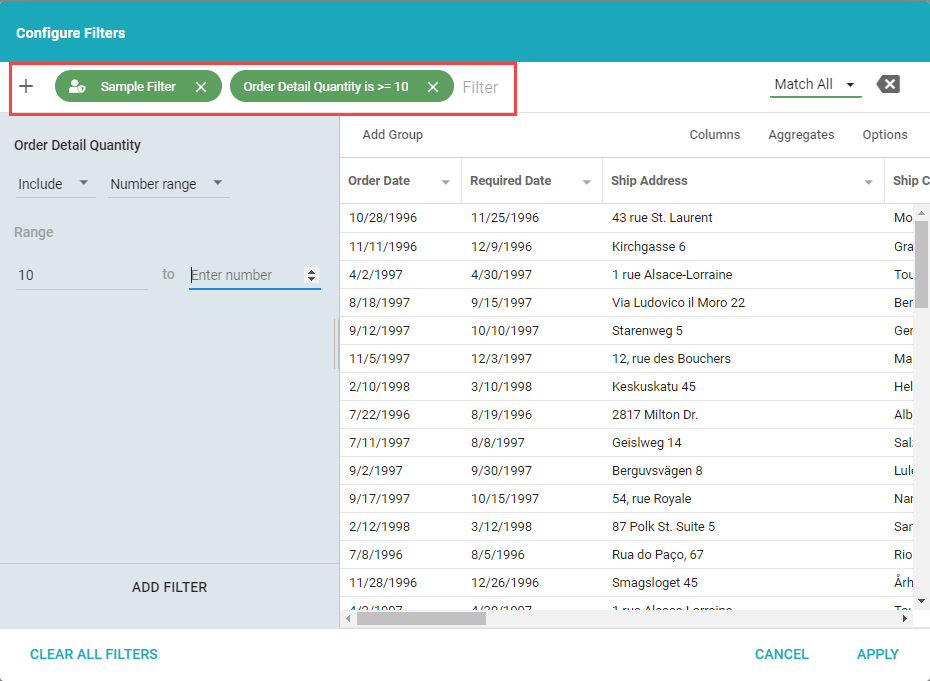
Narrow the results further by adding additional Filters. Filters appear on the Filter Bar. Click Apply in the bottom-right corner to apply them.
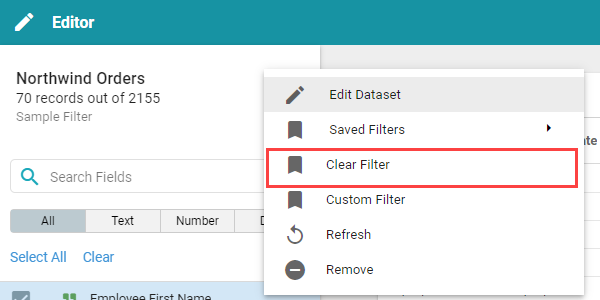
Filtering is also available at the Dataset level when creating a Data View. This lets the creator allow only certain subsets of data to be visible to viewers. Add these Filters in the editor by opening the ... Actions menu and selecting Saved Filters or Custom Filters. Click Save in the upper-right corner to save the Filter to the Data View.
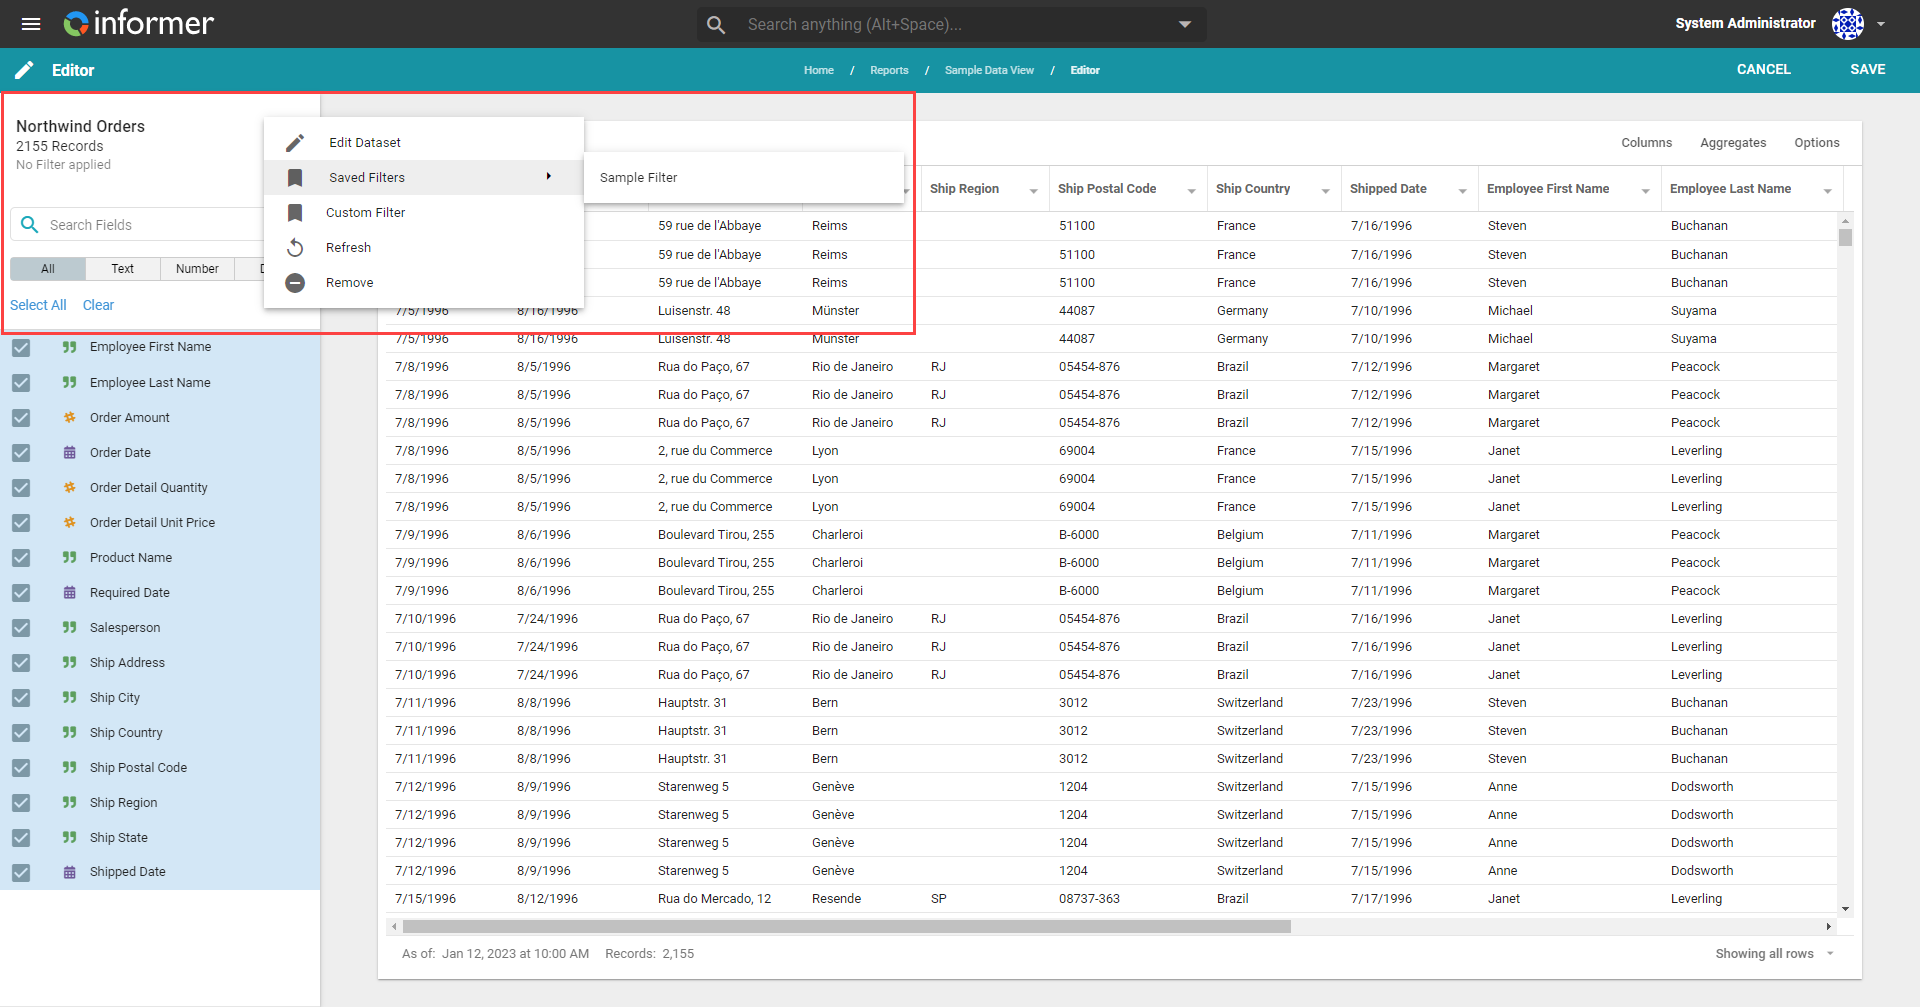
Applying a Custom Filter follows the same steps as applying a Filter while viewing.
Removing Filters
Remove Filters while viewing a Data View by clicking the Filter icon in the top-right corner. Click the X next to an individual Filter to remove it, or select Clear All Filters to remove all applied Filters, then click Apply.
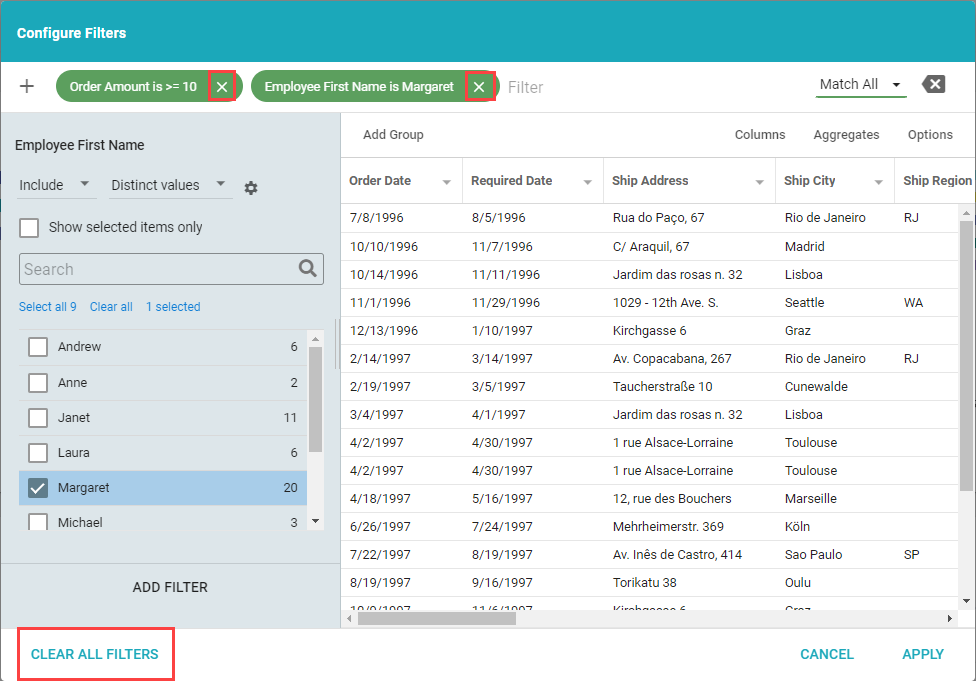
Creators remove Filters in the editor. Open the ... Actions menu and select Clear Filter to remove all Filters from the Data View. Remove individual Filters through the Custom Filter menu, following the same steps as removing them while viewing. Click Save in the upper-right corner to save the changes.